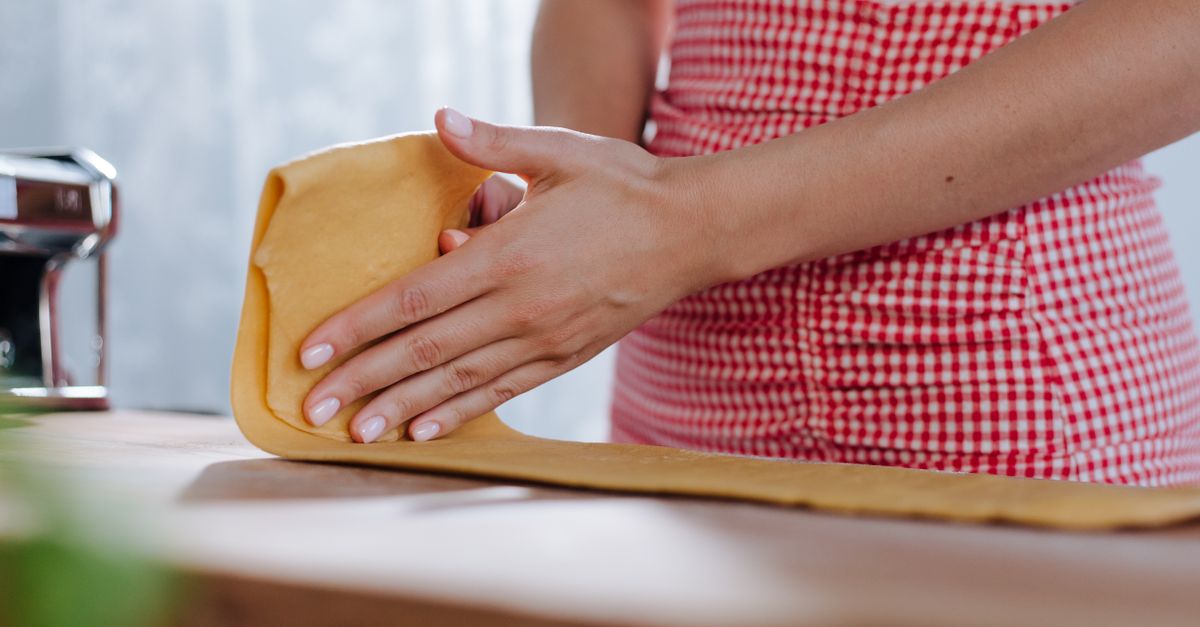
Why Your Homemade Pasta Isn't Silky (And The Simple Shifts That Guarantee Tender Perfection Every Time)
You’ve spent the afternoon kneading dough, carefully rolling it out, and painstakingly cutting your strips, only to end up with a plate of pasta that’s more rubbery than delicate. It’s a common frustration, a culinary disappointment that hits hard when you’ve invested time and effort into making something from scratch. What went wrong? You followed the recipe, used good flour, but your pasta lacks that ethereal, silky texture you crave from a truly authentic dish.
In my experience, the journey to perfect homemade pasta is less about exotic ingredients and more about understanding subtle technique. The mistake I see most often, and one I certainly made myself for years, is a fundamental misunderstanding of how the ingredients interact and how moisture plays a critical role. This isn’t just about ‘enough’ water or ‘enough’ flour; it’s about the right kind of hydration and the right handling at each stage. What changed everything for me was realizing that the conventional wisdom often misses crucial nuances that transform a passable pasta into a masterpiece. I went from producing thick, chewy noodles that dominated the sauce to delicate strands that truly became one with it. It’s a revelation that elevated my home cooking significantly, and it can do the same for yours.
Key Takeaways
- Embrace high-quality ‘00’ flour or a precise mix with semolina for optimal protein and gluten development.
- Master the art of gradual hydration, adjusting water content drop-by-drop based on humidity and flour type.
- Prioritize a long, undisturbed rest period for the dough to relax gluten and simplify rolling.
- Avoid over-flouring during rolling and cutting to prevent a tough, dry end product.
The Flour Factor: Why ‘All-Purpose’ Isn’t Always Your Best Friend
When I first started making pasta, I simply grabbed whatever all-purpose flour was in my pantry, thinking flour was flour. Big mistake. While you can make pasta with all-purpose flour, you’re fighting an uphill battle for that elusive silky texture. The protein content and milling process of different flours dramatically impact the final result. All-purpose flour often has a mid-range protein content that can lead to dough that’s either too elastic to roll thin or too soft to hold its shape.
What truly works, in my experience, is a specific type of flour: ‘00’ flour. This Italian-milled flour is incredibly fine, almost like talcum powder, and has a lower protein content (around 10-12%) specifically optimized for pasta and pizza. Its fine texture allows for a smoother, more extensible dough that can be rolled incredibly thin without tearing, resulting in a tender, delicate bite. If ‘00’ flour isn’t readily available, a blend of high-quality unbleached bread flour (which has a higher protein content for strength) and semolina flour (for texture and chew) can yield excellent results. My go-to blend when I can’t find ‘00’ flour is 70% unbleached bread flour to 30% fine semolina flour. This combination gives you the strength from the bread flour to prevent tearing and the subtle grit from the semolina for a desirable al dente chew, without becoming rubbery. The key is to start with flour that has the right characteristics for pasta making, not just any flour.
Hydration is an Art, Not a Science: The Drop-by-Drop Method
Many pasta recipes provide a precise amount of water per cup of flour, and while this is a good starting point, it’s also a common pitfall. Flour absorbs moisture differently based on its type, age, and even the humidity in your kitchen. Adding too much water upfront is one of the quickest ways to ruin pasta dough, making it sticky, difficult to work with, and ultimately leading to a tough, gummy texture when cooked. Conversely, too little water results in a crumbly, dry dough that won’t come together or roll out smoothly.
What actually works is treating hydration as an iterative process, adding liquid drop by drop. My method starts with a slightly drier mixture than most recipes suggest. For every 100 grams of flour, I typically begin with one large egg and, if needed, add water slowly. I make a well in the center of my flour, crack in the egg, and gently incorporate the flour from the sides. As the mixture comes together, I assess its consistency. If it’s too dry and crumbly to form a cohesive ball, I add a mere teaspoon of water at a time, incorporating it fully before adding more. This can be a slow process, sometimes taking 5-10 minutes of gradual additions and kneading, but it ensures you hit the sweet spot: a dough that is firm, slightly tacky but not sticky, and smooth to the touch. This precise hydration allows the gluten to develop properly during kneading and resting, leading to a much more pliable and tender pasta.
The Power of the Rest: Why Patience is a Virtue
After all that kneading, it’s tempting to immediately start rolling. Resist the urge! This is another critical mistake I made for years. Skipping or shortening the rest period is a guaranteed way to end up with tough, springy dough that fights you every step of the way, refusing to roll thin and snapping back into shape. This constant resistance means you apply more force, which then overworks the gluten, leading to even tougher pasta.
The game-changer for me was understanding the science behind the rest. During kneading, the gluten network tightens. A proper rest period—at least 30 minutes, but ideally 1 to 2 hours, tightly wrapped in plastic wrap at room temperature—allows these gluten strands to relax. This relaxation makes the dough incredibly pliable and elastic, requiring minimal effort to roll it out evenly and thinly. Think of it like a muscle after a workout; it needs time to recover before the next strenuous activity. A well-rested dough yields pasta that is significantly more tender and easy to work with. I often prepare my dough in the morning or the night before, letting it rest for several hours or even overnight in the fridge (bringing it to room temperature before rolling), and the difference is always astounding. It makes rolling a joy, not a battle.
Less is More: The Case Against Over-Flouring Your Work Surface
Once your dough is perfectly rested, the next common mistake is reaching for the flour shaker with a heavy hand. We’re often taught to flour our work surface and rolling pin generously to prevent sticking. While some flour is necessary, too much will dry out your dough’s surface, making it crack when rolled, and incorporating excess raw flour into your pasta. This extra, unhydrated flour can make the cooked pasta taste heavy, starchy, or even gritty, completely undermining that silky texture you’re striving for.
What actually works is a light, almost imperceptible dusting. Instead of constantly flailing flour, focus on maintaining an adequately hydrated dough to begin with. During rolling, if you feel a slight stick, a quick, light brush of flour (or even semolina, which is less prone to clumping) on the specific sticky area is all you need. Better yet, if you’re using a pasta machine, I’ve found it helps to run the dough through the widest setting a couple of times, folding it each time, before progressively thinning. This initial roll-and-fold process helps to further develop gluten and reduce tackiness naturally, minimizing the need for additional flour. Your goal is to keep the dough just hydrated enough to glide smoothly through the machine or under the rolling pin, without a visible coating of flour on its surface.
The Boil: Don’t Let It Become a Calamity
Finally, you’ve made your beautiful, tender pasta. The last hurdle is cooking it. Many home cooks make two critical mistakes here: not enough water and not enough salt. Boiling pasta in too little water allows the starch to become highly concentrated, leading to gummy, sticky noodles that clump together. It also cools the water too quickly when the pasta is added, resulting in uneven cooking.
What actually works is using a generous amount of rapidly boiling, heavily salted water. For every pound of pasta, I recommend at least 4-6 quarts of water. The water should taste like the sea—about 1-2 tablespoons of salt per gallon. This high salt content seasons the pasta from the inside out and helps prevent clumping. When you add the pasta, the water should return to a rolling boil quickly. Give it a gentle stir immediately to prevent sticking. Fresh pasta cooks very quickly, often in 2-4 minutes, so stay vigilant! Taste a piece a minute or so before you think it’s ready. You’re looking for al dente—firm to the bite but tender throughout, with no raw flour taste. Properly cooked pasta is the final step to achieving that desired silky texture.
The journey to perfect homemade pasta is a rewarding one, full of delicious lessons. By focusing on the right flour, precise hydration, ample resting, minimal flouring, and proper boiling, you’ll elevate your pasta game from good to extraordinary. Each step, though seemingly small, contributes significantly to that tender, silky bite that makes all the effort worthwhile. Dive in, be patient, and enjoy the incredible difference these shifts will make.
Frequently Asked Questions
Q1: Can I use bread flour instead of ‘00’ flour for pasta?
A1: Yes, you can, but it’s best to blend it. Bread flour has a higher protein content, which can make pasta tough if used exclusively. I recommend a 70/30 blend of high-quality unbleached bread flour and fine semolina flour. The semolina adds a subtle chew and texture, balancing the strength of the bread flour for a more tender result.
Q2: How long should I knead my pasta dough?
A2: Kneading time varies, but generally, 8-12 minutes by hand or 5-7 minutes in a stand mixer with a dough hook is sufficient. You’re looking for a dough that feels smooth, elastic, and springs back slowly when poked with a finger. Over-kneading can lead to a tough dough, so pay attention to the texture rather than just the clock.
Q3: What happens if my dough is too sticky after resting?
A3: If your dough is still too sticky after resting, it likely received too much hydration. Gently knead in small pinches (about half a teaspoon at a time) of ‘00’ flour or semolina until it reaches the desired non-sticky, pliable consistency. Be careful not to add too much at once, as this can quickly dry out the dough.
Q4: Can I freeze homemade pasta?
A4: Absolutely! Freshly cut pasta can be lightly floured (using semolina is great here to prevent clumping) and spread on a baking sheet to dry for about 15-20 minutes, or until it no longer sticks together. Then, transfer it to an airtight container or freezer bag and freeze for up to 2-3 months. Cook directly from frozen in boiling, salted water, adding an extra minute or two to the cooking time.
Q5: How do I prevent my pasta from clumping when cooking?
A5: Use plenty of heavily salted, rapidly boiling water (at least 4-6 quarts per pound of pasta). Stir the pasta gently immediately after adding it to the pot, and then occasionally throughout cooking. The ample water helps to dilute the starch, and stirring prevents the noodles from sticking together as they release starch.
Written by Marcus Thorne
Productivity & Habit Formation
With a background in behavioral psychology research, Marcus is passionate about uncovering the science behind effective daily habits.
You Might Also Like

Why Your DIY Car Detailing Fails Most People (And What Actually Works for a Showroom Shine)
Ever wondered why your DIY car wash never quite matches a professional detail? Discover the crucial mistakes most people make and the techniques that truly deliver a showroom shine.

Why Your Home Still Feels Stuffy (Even After Opening Windows) — And What Actually Works for Real Fresh Air
Discover why your home feels stuffy despite open windows and learn the practical, non-obvious strategies for true, lasting fresh air.
Why Your Home Still Feels Stuffy (Even After Opening Windows) — And What Actually Works for Real Fresh Air
Discover why your home still feels stuffy even with open windows and learn actionable, counter-intuitive strategies for truly fresh indoor air.